Exciting enhancements to the Adaptive Card Designer are now available for Tikit users. Tikit not only builds on Teams, but it also builds on Microsoft’s Adaptive Card Designer framework to support customizations so you can:
- Apply Templates with Custom Forms
- Have Tikit Virtual Agent (TVA) respond with those very same forms to gather input at ticket creation
- Build Custom Forms using the Microsoft Adaptive Card Designer
And up until this point, we’ve rendered that exact Microsoft experience throughout Tikit. But now, we’re taking the Adaptive Cards Designer even further to give you more flexibility and more customization, all within an experience you already know.
New Options in Adaptive Card Designer
Our latest update introduces all Ticket Properties, some Ticket Extras, and a new Input (People Picker) when designing Custom Forms.

So, if you’re looking to:
- Let an End User pick other Affected Users when submitting a ticket
- Set a Category or Tags on ticket creation
- Let an End User upload Attachments on initial ticket submission
- Remove the “Status of My Requests” button from the New Ticket card
- Wholly customize the default New Ticket card
- Give fields entirely different names
- Dynamically control the Request with variables
Now, you can!

Inputs
We’ve heard and delivered on this request from several customers, “I really want to be able to provide a People Picker.”

The new People Picker control can be dragged and dropped directly into a form. Like other controls, it can be renamed to something else, set to optional or required, and can allow “single” or “multiple” selections. The selection does not map to any underlying ticket property, but is available on the form, and thus able to be used inside of Excel, Power BI, and Power Automate.
Ticket Properties, Variables, and The Default Template
A more significant impact to tickets being worked is the ability to control the Status and Tags, as well as Adding Attachments. Once any of these is placed on a form, the underlying ticket property will shift accordingly, whether you are applying the Template yourself or it is being served via Deflection. Bringing Ticket Properties to forms allows End Users and Agents to directly control those properties before (and even after) the ticket is submitted.
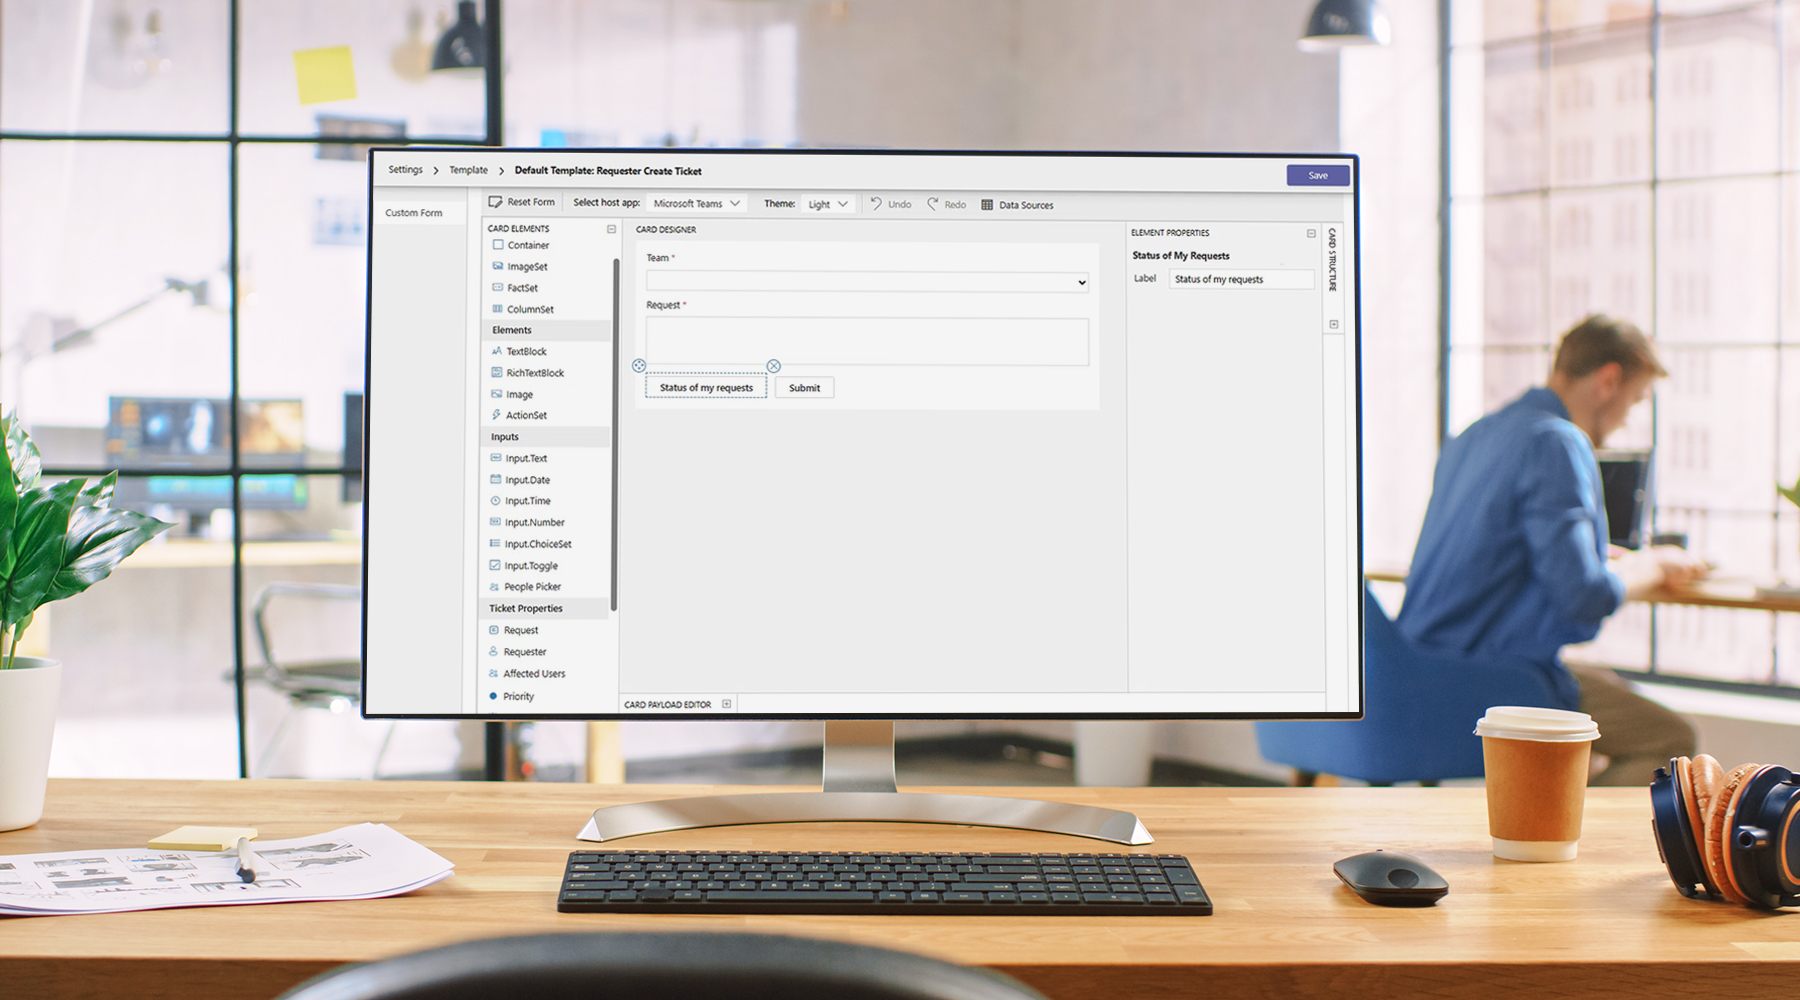
Default Template: Requester Create Ticket
Another request we’ve heard often is for the ability to edit the New Ticket card. Up until now, whenever you typed “new ticket” in Tikit Virtual Agent or when there was no Deflection to serve, the card below is what was presented. While this Template shows “Created By Tikit,” it can now be modified as little or as much as you’d like thanks to the new functionality of this Tikit update.

Recreating the Email Experience in Teams
The improvements also include more exciting customization capabilities.
When using Tikit’s email connector:
- the Subject of the email becomes the Request
- and the Body of the email becomes the first comment on a ticket
With our latest update, you can now optionally build that experience to be served by Tikit Virtual Agent. Best of all, this could be your Default New Ticket template, a new process you want to create for Deflection, or both.

In the above, we’re using the:
- Request property (renamed to Summary)
- Add Comment (renamed to Detailed Explanation)
You’ll notice that with regards to Add Comment, you can optionally enable support for Internal Notes. Perfect for when you’re making forms just for Agents. Regarding the Request field, we have a few more options to explore:

Apart from being able to rename the field, you can also perform three additional actions with the Request field:
- declare if the field is Initially Visible to the person filling the form out
- process variables from the Teams Conversation and/or the Card itself
- declare the contents of the request for the End User.
Yes, declare the contents of the request for the End User.
Ticket Variables and Form Variables
Historically, during a chat with Tikit Virtual Agent when no Knowledge could be served, the message sent to TVA auto filled the Request portion of the card.

Now it is a variable you can use to hardcode text in front of {{message}} or after. Or you could choose to remove {{message}} entirely.
Assuming an Onboarding Request as an example, you could:
- remove {{message}}
- uncheck Initially Visible
- modify an existing Template to use the Id of other inputs on the form to control the Request without having to use Power Automate to update it.
In the following example we see how a few fields are used together instead of {{message}} to form the Request.
First Name = firstName

The Request field has been set to pull in {{firstName}} and {{lastName}}.

Notice that the Ticket has been submitted and Request equals “Onboarding – Lance Henriksen” according to the configuration set above.

This grants total flexibility over the message that triggered the TVA response, the Request, and if the chosen fields are even shown initially to the user completing the form.
Default Template: Multi-Department Picker
Since the default Template can be modified to include a Team picker, we’re removing the following setting from Bot Configuration.

But don’t worry! Whether you had it enabled or disabled – we’ve migrated that experience into your respective Default Template for you.

Add Attachment, Collaborators, and Assignment
Add Attachment
One of our biggest requests has been the ability to upload files during initial ticket creation. And now, simply dragging the “Add Attachment” control into your form to allow a user to do just that!

Collaborators
If you’re looking to define who else should be assigned to a ticket, you can drag the Collaborators control out onto a form. This control features two presentation choices: Lookup is the default behavior as seen below.

List is another option that shows all Agents, who can be checked off on the form.

Which presentation layout you choose above ultimately depends on your preference.
- If you only have a few agents, List might make more sense as there is a small list of Agents to choose from.
- If you have tens or hundreds of Agents or are heavily leveraging Multi-Department scenarios with Tikit, Lookup will help keep your form tidy.
Assignment
We’ve also introduced support for a unified control that helps you scope the assignment of a ticket.

With the Assignment control, you can narrow down the list of potential Assignees on a form based on their Team/Group. In this case, you could imagine a scenario where Change Requests for IT should only allow IT-based Assignment.

Data Sources
Yet another request we have addressed with this release is the ability to customize the choices a Requester has when filling out a form. Specifically:
- What if on Multi-Department picker, you only want to show 3 of your 7 Teams?
- What if you want the Requester to pick from 5 of your 40 Categories?
- What if you want the Requester to pick from 7 of your 100 Tags that are “locations?”
With Data Sources, we’re giving you more ways to present what exists in your environment to Requesters without oversharing on a Template-by-Template basis. Best of all, Data Sources are configured globally so you can create, edit, and delete Data Sources as you see fit. Data Sources are applicable to all pickers you use in Tikit today: Teams, Groups, Tags, Categories, and so on.
In the following example, we’ve created a Data Source to show a trimmed down selection of Teams but only for the Default New Ticket experience. In this case, we want our users to experience the Multi-Department Picker, but we only want to show a subset of Teams for them to be able to create tickets for.


The Agent Experience
But after all is said and done and your forms are configured/submitted by your fellow employees…
- What happens on the Agent side?
- What if you’re using a Template that sets the Category but the person filling out the form can pick the Category?
- What if you want to alter the answers that control ticket properties after the ticket has been created?
Let’s change some answers on the form and click on “Update Answers”

In this case, you are still allowed to change answers; however, it will shift the underlying ticket properties where applicable. As you might expect, this change is audited in full.

Conclusion
Adaptive Card Designer enhancements bring exciting capabilities that are now live. With so many new ways to customize your experience, we can’t wait to see the kinds of things you build. Be sure to visit the Roadmap to keep an eye on what we have in store next!